Certificate Design in CorelDraw, Simple and Easy Method, Download Source File.
Hello! Friends Welcome to www.vedantsri.net In this Project I am going to Teach you How To Create a Certificate in CorelDraw. In this Project, you can Learn How to Design a Certificate in CorelDraw Application an Easy Method. (Certificate Design in CorelDraw, Simple and Easy Method, Download Source File.)
- Press Windows + R on Keyboard.
- To Open > Run Dialog Box.

- Type CorelDraw in Run Dialog Box > As a Run Command.

- Click on OK.
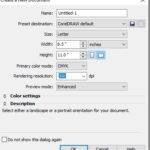
- Click on New Blank Document.

- Fill all Information > Regarding Page.
- Double Click at Rectangle Tool > From Tool Option.

- Draw a Rectangle on the Page.

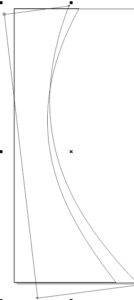
- Press F10 > Ctrl + Q > Click at To Curve Option > To Convert in Curve.

- Left Click at Bottom Corner of Rectangle > Click at To Curve > 2 nodes appear >like this.

- Click at Nodes One by One > Give shape > Like this.

- Click at Rectangle > Press Ctrl + D > to Duplicate Shape > Duplicate Rectangle > Set like this.
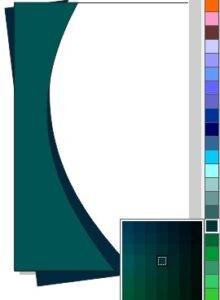
- Select Rectangle > One by One > Change Color of Rectangle > From Color Palate > Like this.
- Select Both Rectangles with Shift + Mouse Click > Click at Effect Menu > Click at Power Clip option > Click at Place Inside Container.
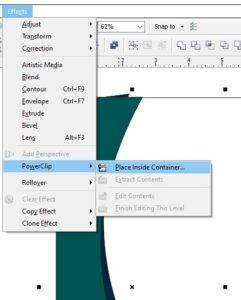
- Something like this appears.

- Draw a rectangle > Press F10 Shape Rectangle like this > Set like this > Select and Power Clip.

- Put LOGO on Certificate > Go to File Folder > Select Photo > Drag Photo to CorelDraw Application > Put at Page > like this.

- Draw a Circle > For Outer Design > Select Circle > Increase Outline from here.

- Change the Color of the Circle > Select LOGO and Outer Circle > Press Ctrl + G > To Group both.
- Click on Text Tool > To type matter.

- Click on Page > Type Institution Name.

- Select Text > Change Font Style > From Font List > Increase or Decrease Size of Font From Font size.

- Type Matter > Regarding Certificate like this.

- Now Certificate is Ready

Created and Explained By Sakshi Rawat.
Important Links
1-VedantSri Official Website:- https://vedantsri.com
2-Student Support Website:- https://www.vedantsri.net
3-Jobs Assist Website:- https://www.jobdo.in
External Link
1-VedantSri Official Website:- https://vedantsri.com
2-Course Store Website:- https://vedantsri.in
3-Jobs Assist Website:- https://www.jobdo.in
4-MS Word Class:- https://mswordclass.com/
5-Corel Free Class:- https://corelclass.com/
6-Free Excel Class:- https://msexcelclass.com/

